Redis Implementation on ASP.NET Core Projects
Hi everyone! In this article i will explain what is Redis? and how to implement Redis in ASP.NET Core projects.

What is Redis?
Remote Dictionary Server (Redis) is a NoSQL database that stores data as key-values. It is written using the C programming language. It is completely open source on Github. (https://github.com/redis/redis)
Redis advantages
Redis works very fast because it stores data on memory and reads and writes from it. So, it’s used as a cache infrastructure on applications. The data are written on Redis at regular intervals and the user is enabled to access this data quickly.
Redis can also be used to store session information. Because it can read in very fast times, it is very convenient to use for Session information.
Installing Redis Local
I will talk about the installation of Redis on the Windows operating system.
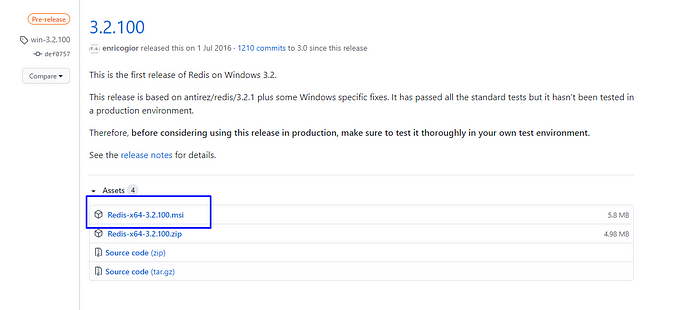
The first thing you need to do is to select the appropriate Redis version from the Github release section, download the “.msi” file and install it.
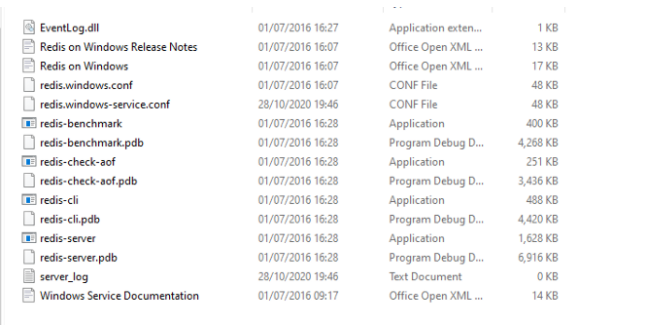
After installation, a folder containing the following files will be created under Program Files -> Redis folder on your computer.
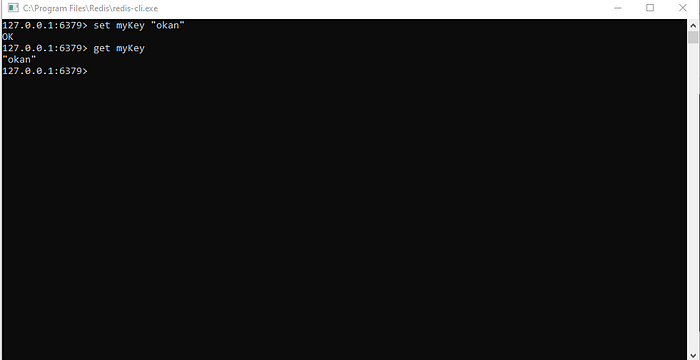
When we double click on redis-server.exe, we will run the server on our local computer. After that, we can test the server operating status with redis-cli.exe. You can check it by setting a value for a key and reading it afterwards.
Implementation on ASP.NET Core
After installing a redis-server on our computer and testing it, it’s time to implement the Redis in our ASP.NET Core project. I will explain on the ASP.NET Core Web Api project.
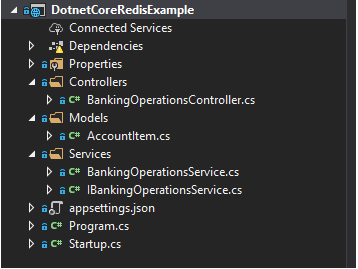
The general file structure of the project is as follows.
First, we set the port and server information we will use with Redis to the ConfigureServices method in the Startup.cs file.

So, we can easily access our server and add or read records by injecting the Redis service on the Controller or on different classes.
This application is to read if the user accounts exist on the Redis server, otherwise it can read from BankingOperationService and write to the Redis server.
As the 2nd step, we open a Controller. With the Dependency injection method, we add the object we will use for Redis server access and the object required for the banking service to our Controller class.

Then I do all my operations with the code below. I will discuss these processes in the rest of the article.
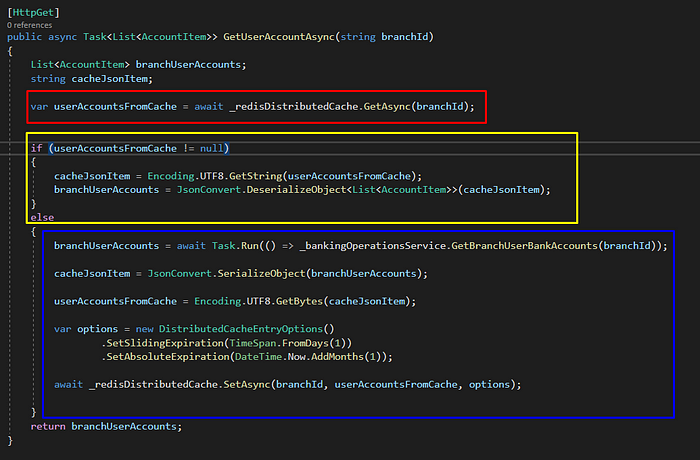
In the red part, is there any data on the Redis server with the branchId used to call the service. We check it out.
In the yellow section, if there is a data on our Redis server with the branchId we query, we first read it and get it as a string.We write the data to Redis as JSON and read it as JSON again. That’s why we deserialize the string value and thus we read the user list through Redis.
In the blue part, if there is no data in our Redis server with the branchId we query, we take it from BankingOperationService and then serialize it as JSON. Then we set the object we serialize as JSON into a string variable. The different thing here is the options object. We make 2 time definitions into the Options object.
AbsoluteExpiration: It determines the storage time of the data on the cache.
SlidingExpiration: If the data is recalled within the given AbsoluteExpiration period, it allows the data to extend the retention time even more.
Summary
We check our Redis server with the code I wrote, if there is any previously written data, we use it, if not, we go and read it from the service and write it back to the Redis server.
You can access the project on my Github account.
I tried to explain the Redis topic as much as I could. Thank you for reading, sharing and applause will increase motivation :)


